SQL2012软件安装教程:
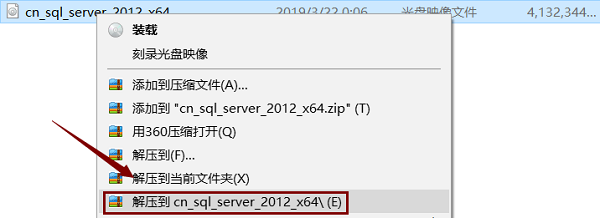
1. 在KK下载站下载到SQL Server 2012软件后,然后右击“cn_sql_server_2012_x64.iso”文件。选择“解压到cn_sql_server_2012_x64”。
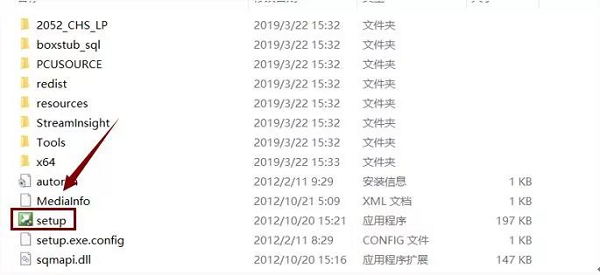
2. 解压好后,打开解压目录。双击“setup.exe”文件。
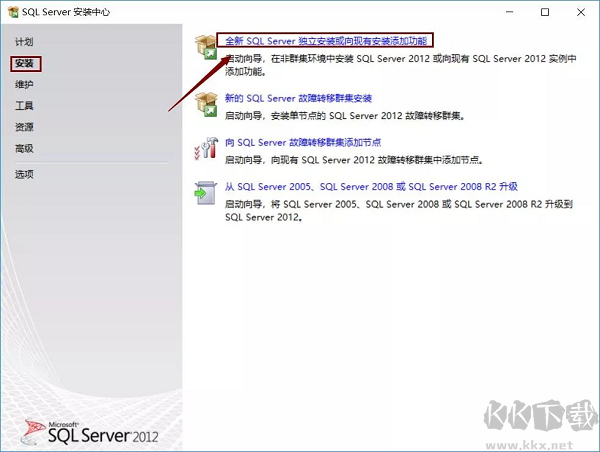
3. 点击“安装”,然后点击“全新SQL Server独立安装或向现有安装添加功能”。
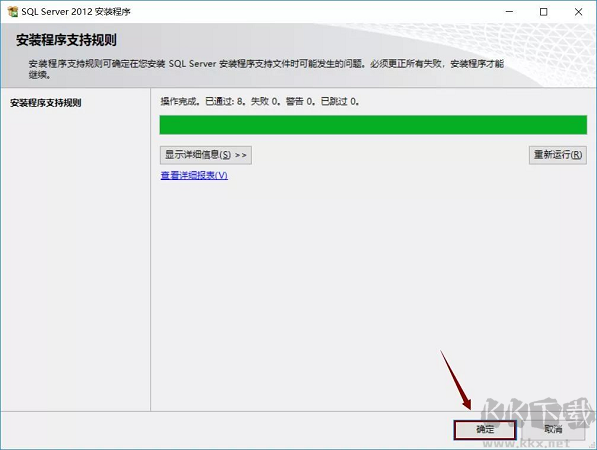
4. 等待进度条走完,点击“确定”。
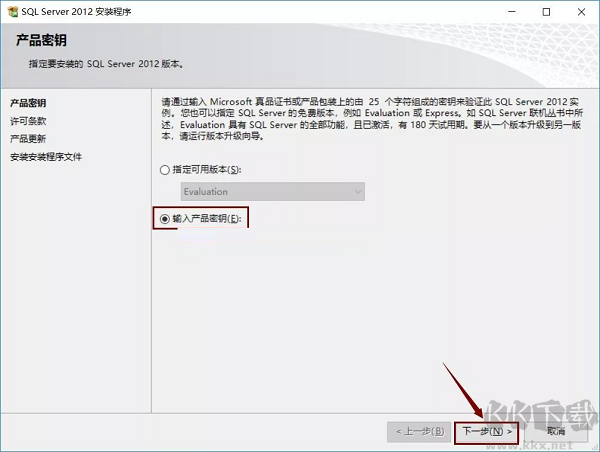
5. 选择“输入产品密钥”。密钥输入第一个不行就试试第二个。再点击“下一步”。
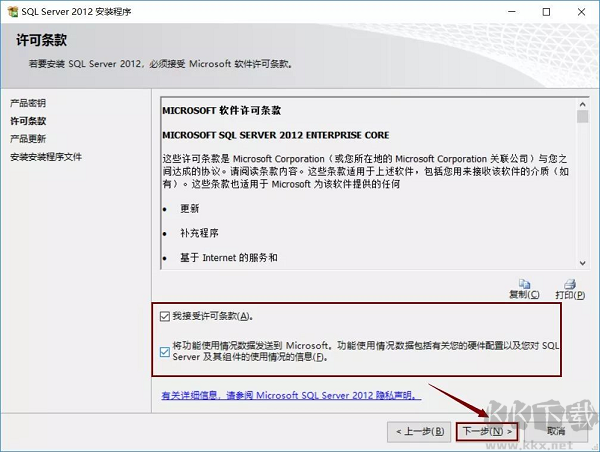
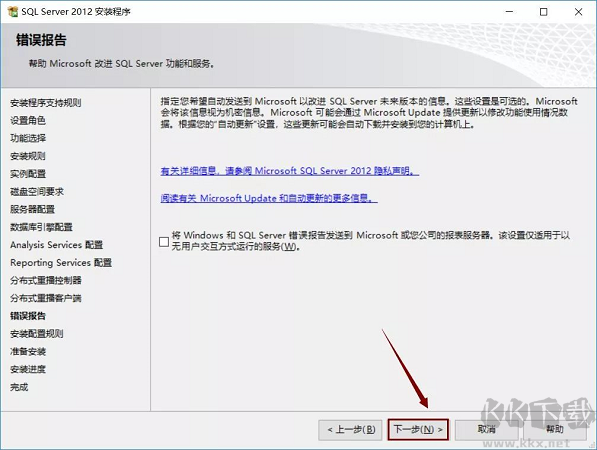
6. 选择“我接受许可条款”和“将功能使用情况........”。点击“下一步”。
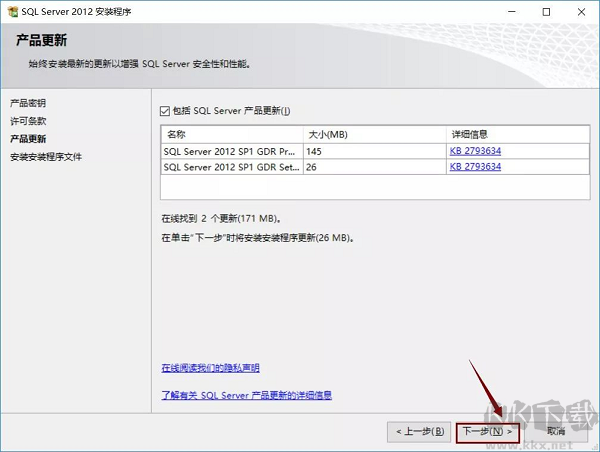
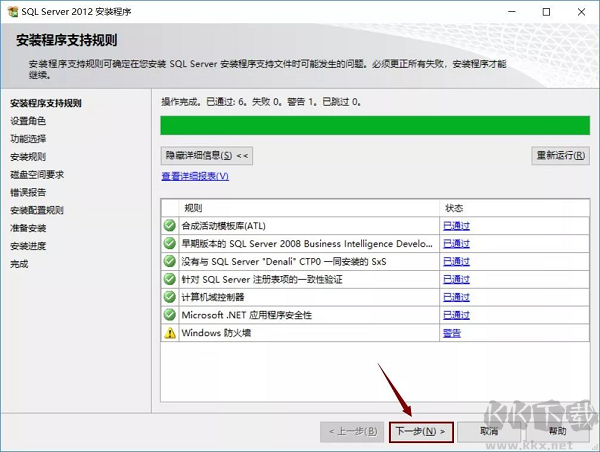
7. 产品更新界面,我们需要点击“下一步”。
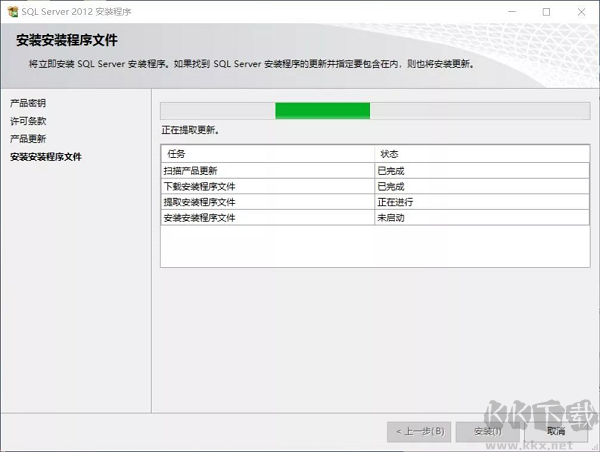
8. 等待状态出现“已完成”。会自动进入下一个页面。
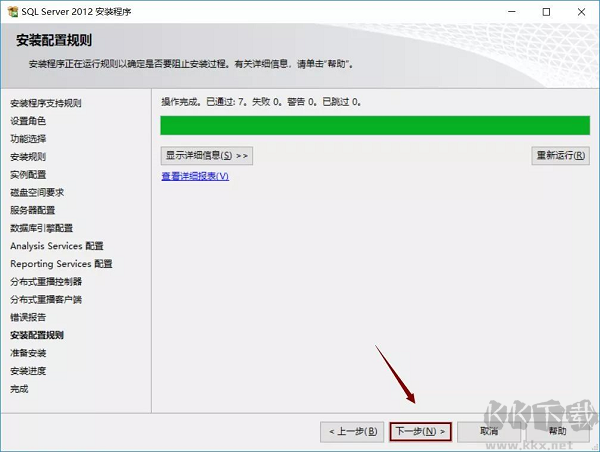
9. 等待进度条走完。点击“下一步”。
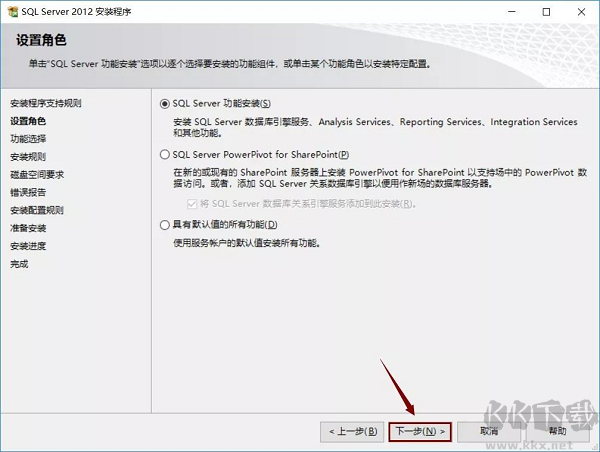
10. 选择“SQL Server功能安装”。点击“下一步”。
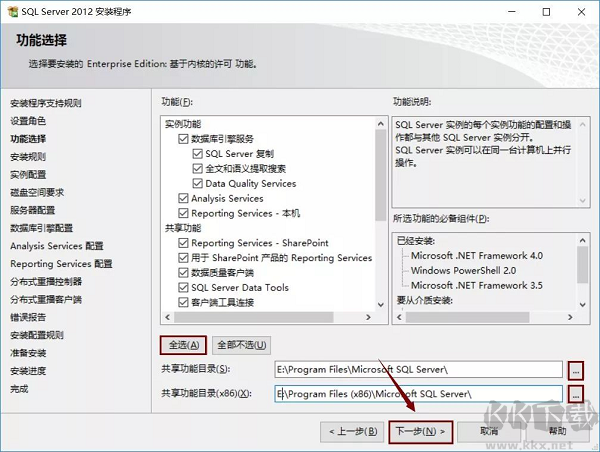
11. 点击“全选”。建议把SQL Server软件安装到C盘以外的磁盘,我这里安装到E盘,所以只需要把字母C改为E即可。点击“下一步”。
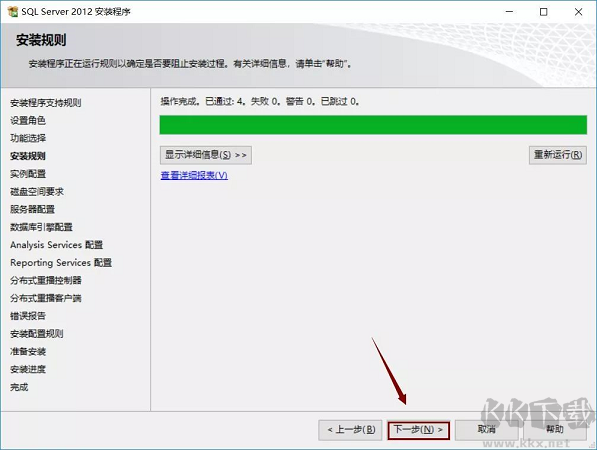
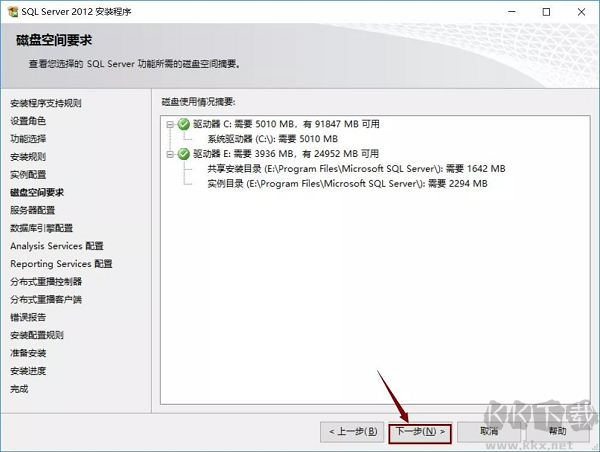
12. 等待进度条走完。点击“下一步”。
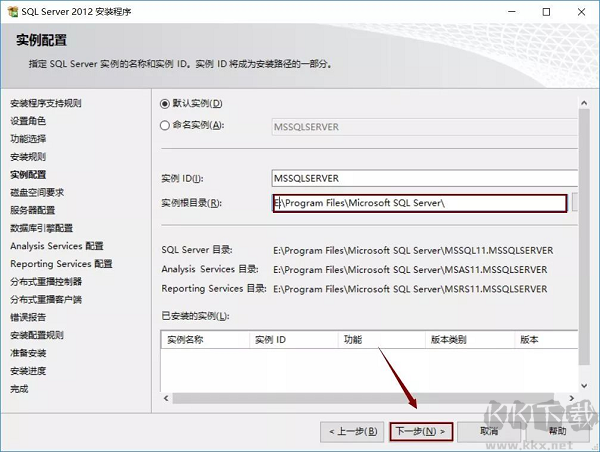
13. 选择“默认实例”,建议把SQL Server软件实例根目录安装到C盘以外的磁盘,我安装到E盘,所以只需要把字母C改为E即可。点击“下一步”。
14. 点击“下一步”。
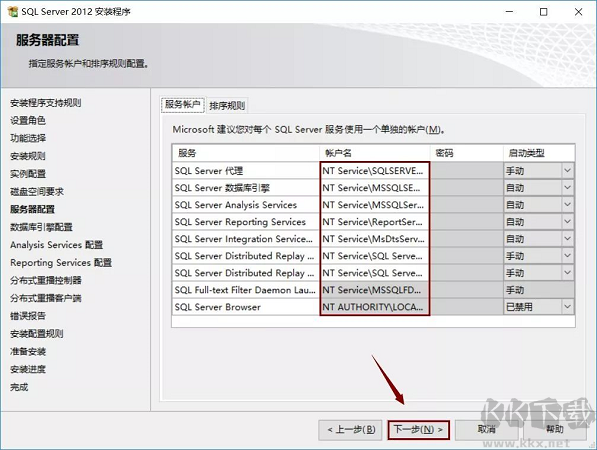
15. 账户名选择“NT ServerSQLSERVE...”点击“下一步”。
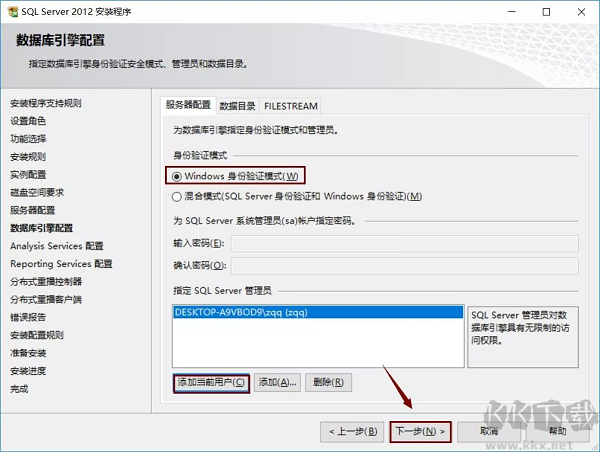
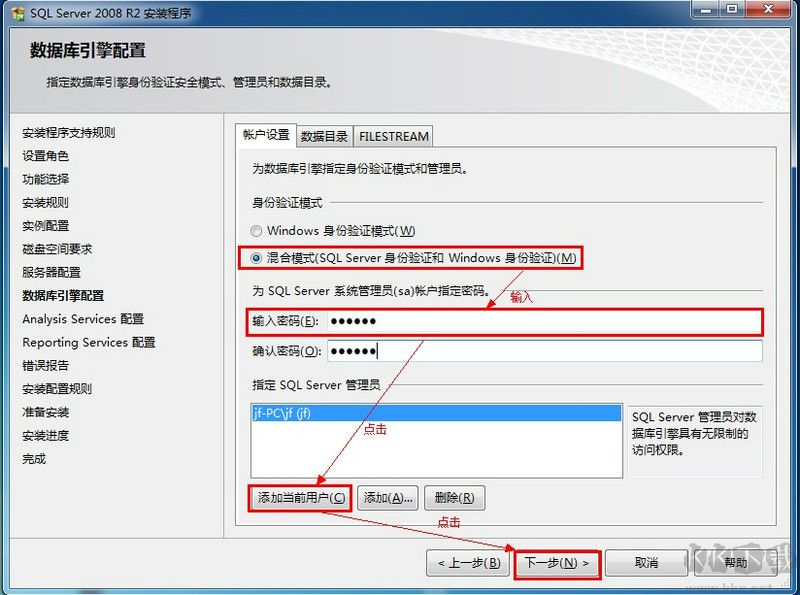
16. 选择“windows 身份验证模式”,点击“添加当前用户”,再点击“下一步”。
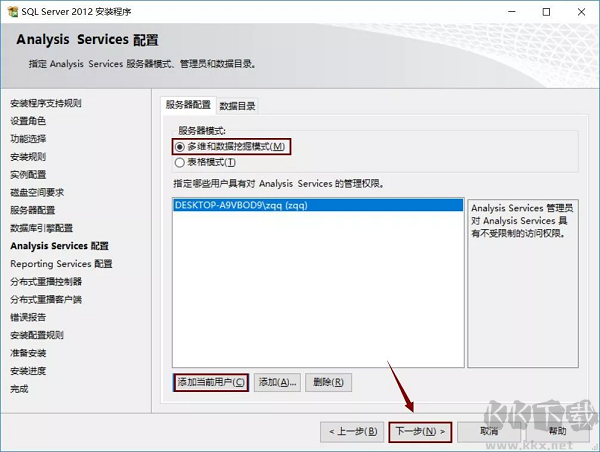
17. 选择“多维和数据挖掘模式”,点击“添加当前用户”。再点击“下一步”。
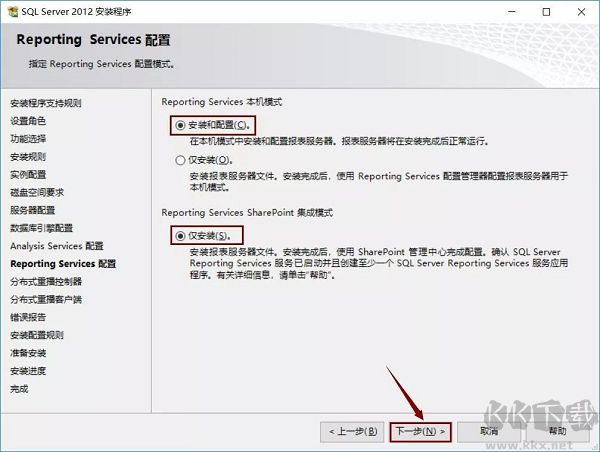
18. 选择“安装和配置”,再选择“仅安装”,点击“下一步”。
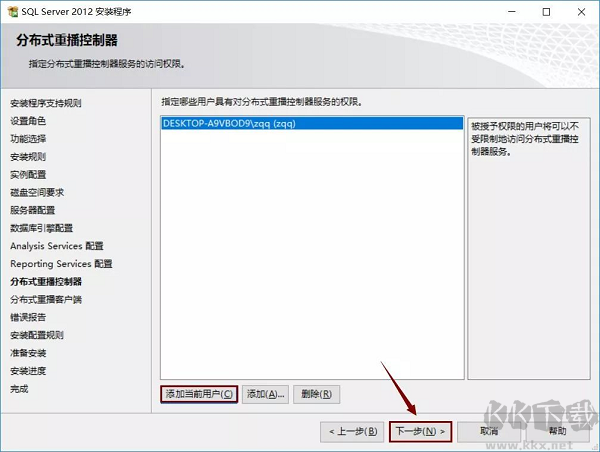
19. 点击“添加当前用户”,再点击“下一步”。
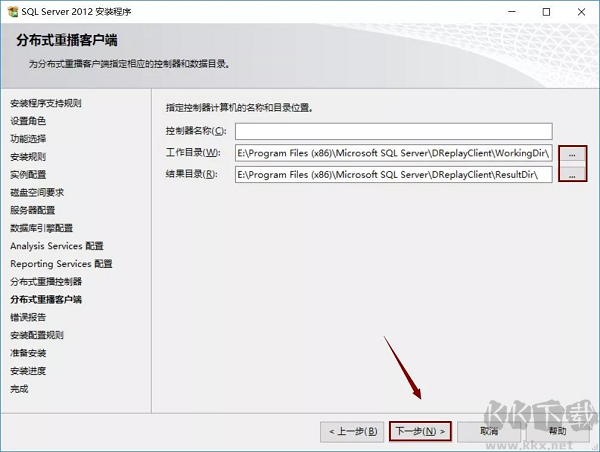
20. 建议把SQL Server软件工作目录和结果目录安装到C盘以外的磁盘,我这里安装到E盘,所以只需要把字母C改为E即可。点击“下一步”。
21. 点击“下一步”。
22. 等待进度条走完。点击“下一步”。
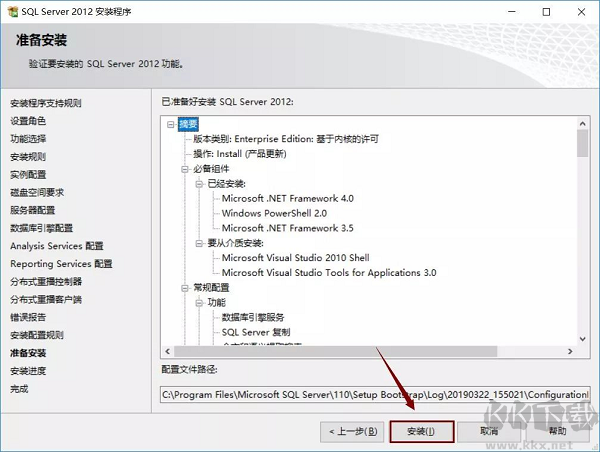
23. 点击“安装”。
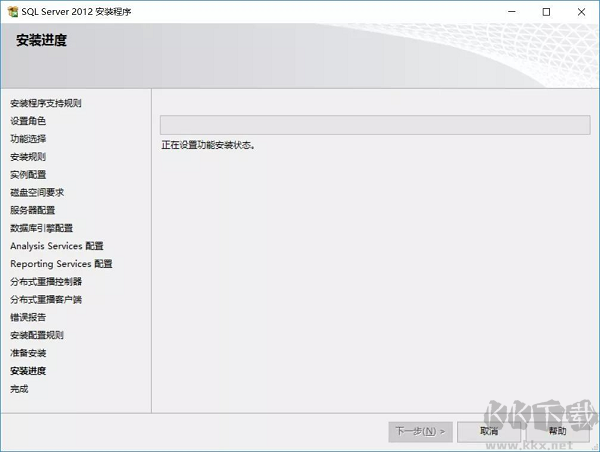
24. 等待安装完成。
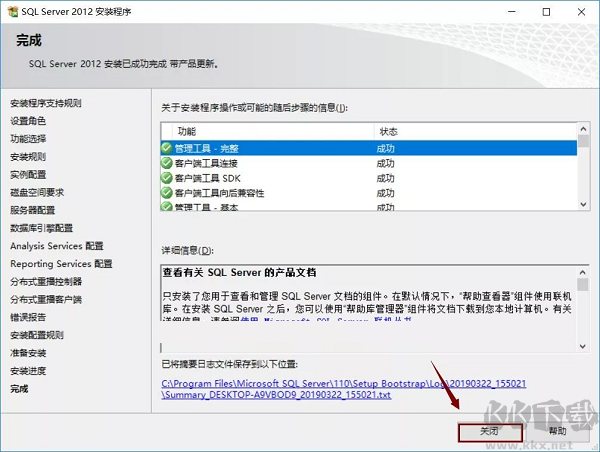
25. 点击“关闭”,重启计算机。
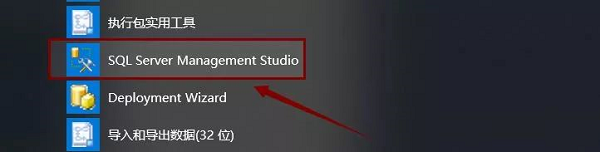
26. 打开开始菜单,点击“SQL Server Mangement Studio”。
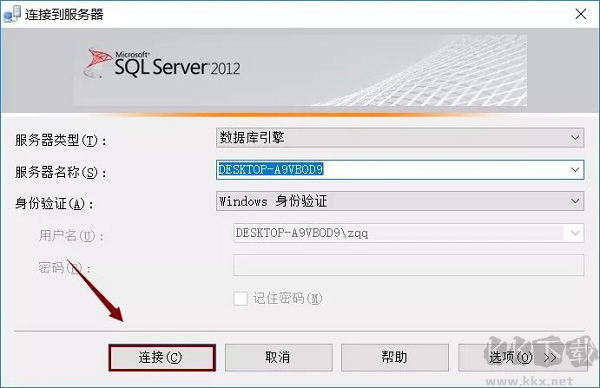
27. 点击“连接”。
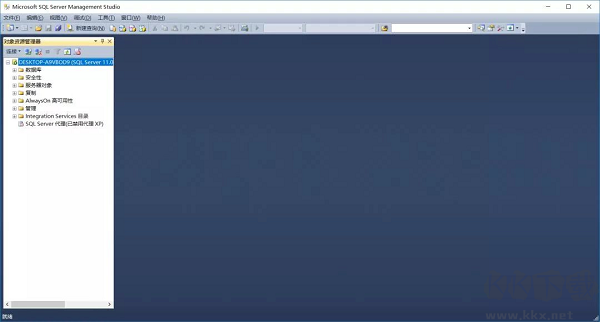
28. 安装完成。
SQL Server 2012使用方法
1、选择开始菜单中→程序→【Management SQL Server 2008】→【SQL Server Management Studio】命令,打开【SQL Server Management Studio】窗口,并使用Windows或 SQL Server身份验证建立连接;
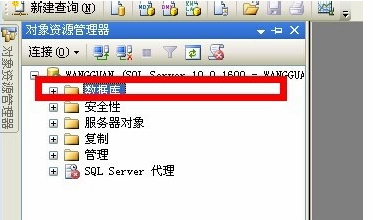
2、在【对象资源管理器】窗口中展开服务器,然后选择【数据库】节点;
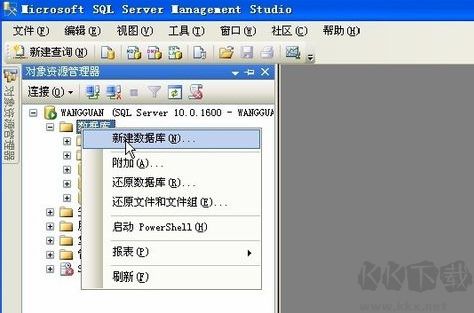
3、右键单击【数据库】节点,从弹出来的快捷菜单中选择【新建数据库】命令。
4、执行上述操作后,会弹出【新建数据库】对话框。在对话框、左侧有3个选项,分别是【常规】、【选项】和【文件组】。完成这三个选项中的设置会后,就完成了数据库的创建工作。

5、在【数据库名称】文本框中输入要新建数据库的名称。例如,这里以“新建的数据库”。
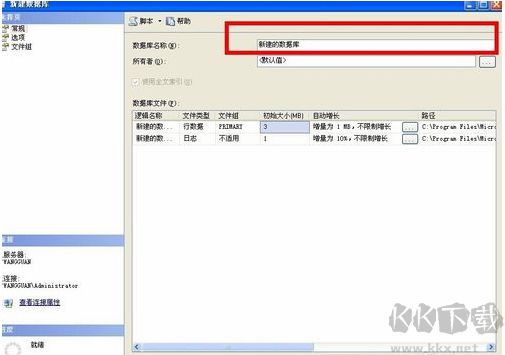
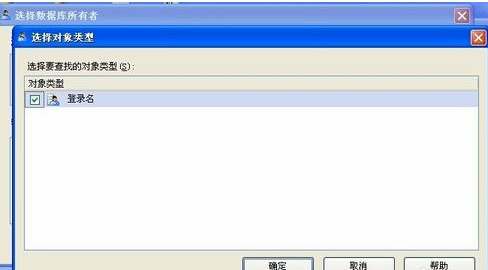
6、在【所有者】文本框中输入新建数据库的所有者,如sa。根据数据库的使用情况,选择启用或者禁用【使用全文索引】复选框。
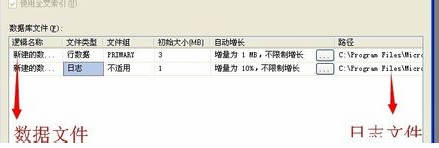
7、在【数据库文件】列表中包括两行,一行是数据库文件,而另一行是日记文件。通过单击下面的【添加】、【删除】按钮添加或删除数据库文件。
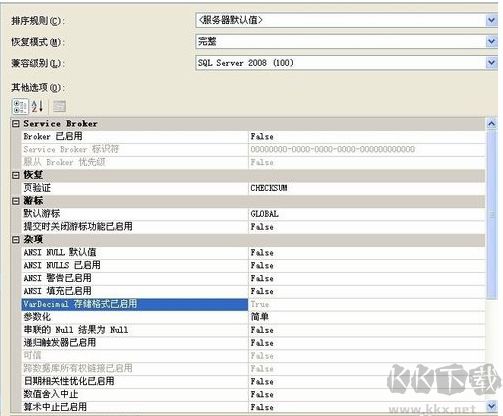
8、切换到【选项页】、在这里可以设置数据库的排序规则、恢复模式、兼容级别和其他属性。
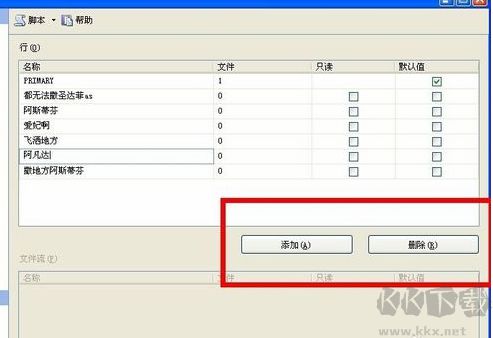
9、切换到【文件组】页,在这里可以添加或删除文件组。
10、完成以上操作后,单击【确定】按钮关闭【新建数据库】对话框。至此“新建的数据”数据库创建成功。新建的数据库可以再【对象资源管理器】窗口看到。

以上就是KK下载站为大家分享的SQL2012的安装教程了,其实其它版本也是一样操作。
注,本站提供的是SQL201264位。