笔记本电脑如何连接打印机
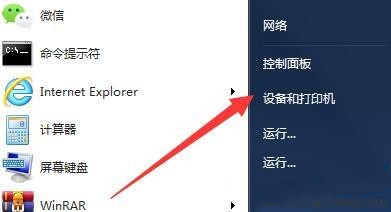
1、以win7系统为例,点击左下角开始菜单,点击“设备和打印机”进入。
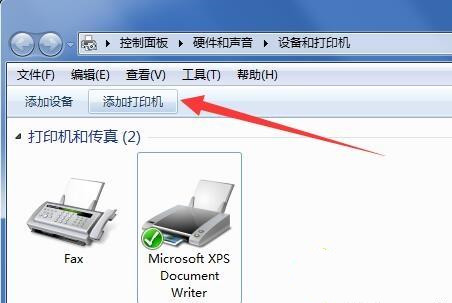
2、接着,在导航栏区域找到“添加打印机”选项点击进入。
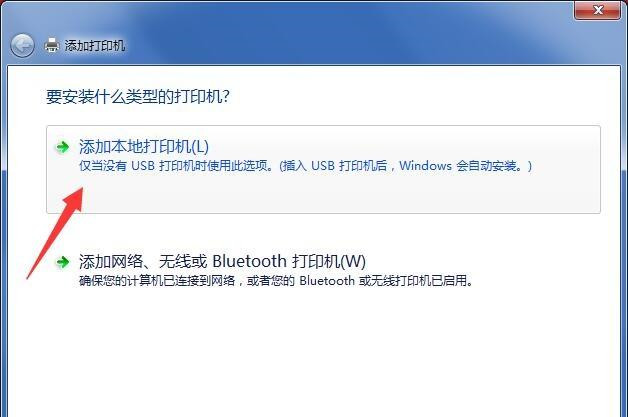
3、弹出新窗口后,选择“添加本地打印机”跳转下一步。
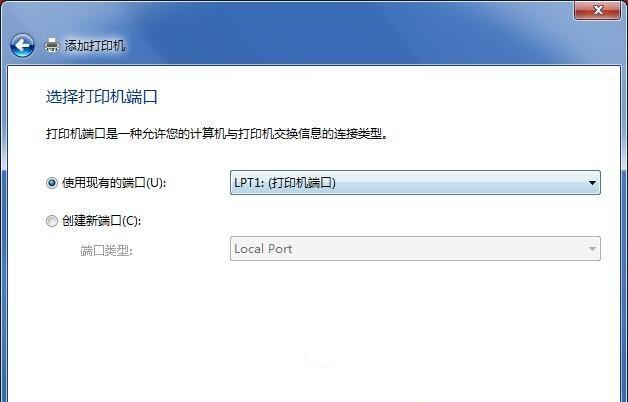
4、默认使用现有的端口,点击“下一步”按钮。
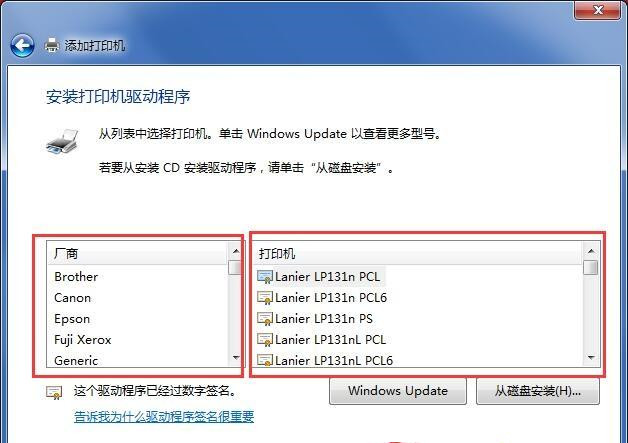
5、选择打印机的厂商以及打印机的型号,下一步,如果找不到对应的打印机型号,选择从硬盘安装驱动,驱动需要先下载到本地。
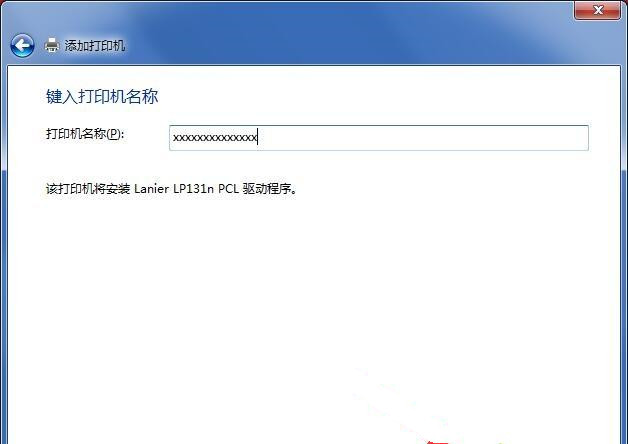
6、为打印机重新命名,点击下一步。
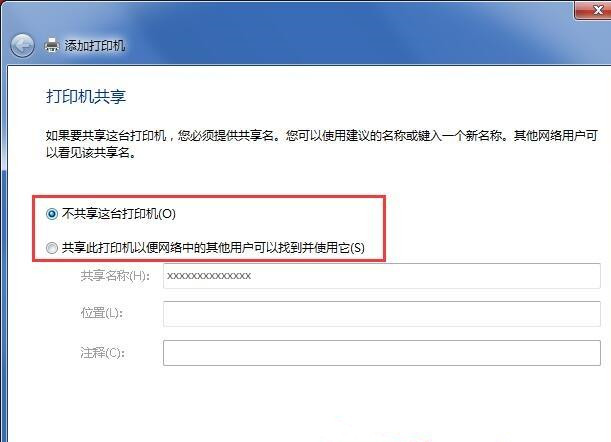
7、如果有多台电脑要使用这台打印机,就选择共享此打印机,如果这台打印机只有我们自己使用,选择“不共享这台打印机”继续下一步。
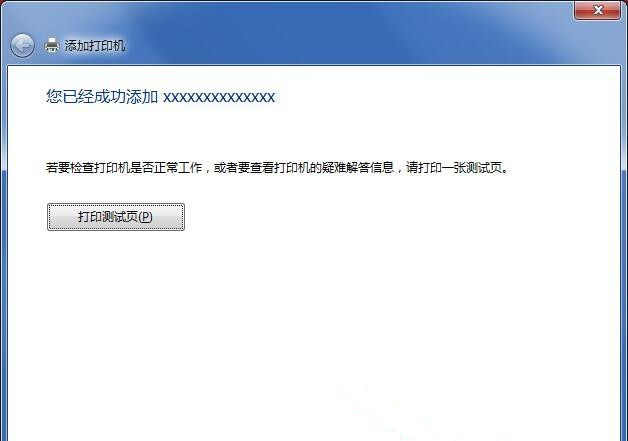
8、当窗口提示“您已成功添加xxxxxxx”的字样,点击完成关闭添加窗口。
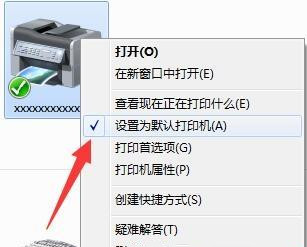
9、回到打印机设备面板,右键新添加的打印机将其设置为默认打印机,完成添加操作。
以上就是关于笔记本电脑如何连接打印机的全部内容,大家只需要按照上面的方法来进行操作,就可以轻松使用笔记本电脑连接打印机了。